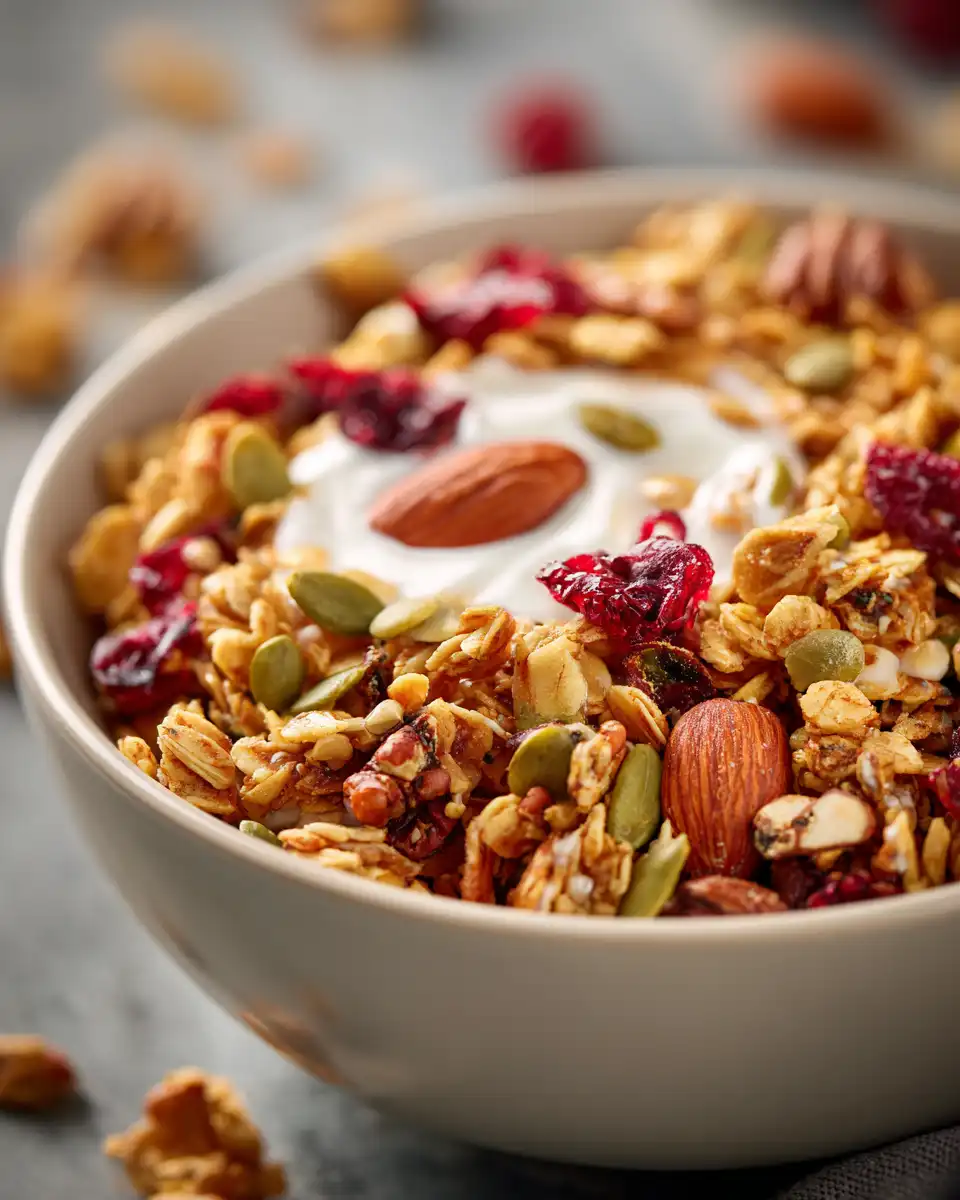
If you want a breakfast that feels healthy, crunchy, and actually worth eating all week, this granola recipe solves the usual problem fast. It gives you golden clusters, toasted flavor, and just enough sweetness, without turning into sugary crumbs or chewy oat rubble.
A lot of homemade granola goes wrong in predictable ways. It burns at the edges, stays soft in the middle, or tastes flat even after a full bake. This version is built to avoid those problems, so you get a homemade breakfast granola that is crisp, deeply toasty, and easy to customize with whatever nuts, seeds, or dried fruit you already have on hand.
Why Homemade Granola Is Worth Making
There is a reason homemade granola keeps pulling people back. You get full control over the sweetness, the texture, and the flavor balance.
Store-bought granola often leans too hard in one direction. It is either sweet enough to feel like dessert, or it is marketed as healthy but tastes dry and forgettable. Homemade granola gives you a better middle ground. You can keep it hearty, lightly sweetened, and packed with ingredients that actually add flavor and texture.
It is also one of the easiest make-ahead breakfasts you can keep in the kitchen. Spoon it over yogurt, pour milk over it, scatter it on smoothie bowls, or grab a handful on busy mornings. If you already enjoy recipes like Apple Cinnamon Oatmeal (Cozy 15-Minute Breakfast) or Greek Yogurt Overnight Oats with Berries, this granola recipe fits naturally into the same breakfast routine while adding something crunchy and shelf-stable.
The Ingredient Choices That Control Crunch and Flavor
Granola seems simple, but each ingredient has a job. When you understand that, the recipe becomes easier to control.
Old-fashioned rolled oats are the base. They hold shape well and toast evenly. Quick oats tend to bake up dusty and fragile, while steel-cut oats stay too hard unless used in small amounts.
Nuts and seeds add richness and better texture contrast. Pecans, almonds, walnuts, pumpkin seeds, and sunflower seeds all work well. The key is not just flavor, but bite. Good granola should not taste like sweetened oats alone.
Maple syrup or honey gives sweetness and helps bind the clusters. This is where texture starts. Too little and the mixture stays loose. Too much and it can turn sticky instead of crisp.
Oil helps the oats toast rather than dry out. It is not there to make granola greasy. It is there to coat the dry ingredients lightly so they brown evenly and develop that deep roasted flavor.
Salt and cinnamon matter more than people think. Salt sharpens the toasted flavor, and cinnamon adds warmth without making the granola taste like dessert. Vanilla rounds everything out and makes the kitchen smell like you made something special.
Good result vs bad result
A good granola batch tastes layered. You notice toasted oats first, then warmth from cinnamon, then richness from nuts, then a little sweetness at the end.
A bad batch tastes sweet first and everything else second.
That difference usually comes from balance, not effort.
How to Build Better Clusters from the Start
If you want those bakery-style chunks everyone digs for first, the biggest decision is what you do before baking and right after baking.
First, mix the wet ingredients thoroughly before pouring them over the oats. You want the sweetener, oil, vanilla, and salt evenly combined so the dry mix gets coated consistently.
Second, press the granola mixture firmly onto the baking sheet. Loose mixture gives loose granola. Pressed mixture gives clusters.
Third, do not stir constantly. That is one of the most common mistakes. If you move the granola too often, you break up the pieces before they have time to set.
And finally, let it cool completely before touching it. Warm granola may feel soft, but that does not mean it is underbaked. Cooling is part of the crisping process.
That single decision, leaving it alone to cool, is what often separates crunchy cluster granola from a tray of toasted crumbs.
Ingredients
This recipe makes about 6 to 7 cups.
- 4 cups old-fashioned rolled oats
- 1 cup chopped almonds
- 1 cup chopped pecans or walnuts
- 1/2 cup pumpkin seeds
- 1/2 cup sunflower seeds
- 1 teaspoon ground cinnamon
- 3/4 teaspoon kosher salt
- 1/2 cup melted coconut oil or neutral oil
- 1/2 cup maple syrup or honey
- 1 teaspoon vanilla extract
- 1/2 cup unsweetened shredded coconut, optional
- 3/4 cup dried cranberries, raisins, or chopped dried apricots, added after baking
Ingredient notes
If you want a more classic breakfast granola, use sliced almonds and skip the coconut.
If you want bigger, chunkier bites, chop the nuts a little less finely.
If you want the recipe to stay on the healthier side, keep the dried fruit moderate. It adds great chew and contrast, but too much can make the granola feel candy-like instead of breakfast-friendly.
Step-by-Step Method
1. Heat the oven and prep the pan
Preheat your oven to 325°F. Line a large rimmed baking sheet with parchment paper.
Parchment helps in two ways. It prevents sticking, and it helps the sticky sweetener bake into clusters instead of welding itself to the pan.
2. Mix the dry ingredients
In a large bowl, combine the oats, almonds, pecans, pumpkin seeds, sunflower seeds, cinnamon, and salt.
Make sure the nuts and seeds are distributed well. If they sit in pockets, some areas will brown faster than others.
3. Mix the wet ingredients separately
In a small bowl or measuring cup, whisk together the oil, maple syrup or honey, and vanilla.
This step seems minor, but it is not. A fully blended wet mixture coats the oats better, which means more even color and better texture throughout the tray.
4. Combine and coat thoroughly
Pour the wet mixture over the dry ingredients. Stir until every part of the oat mixture looks lightly glossy.
Dry patches are a warning sign. If parts of the bowl still look powdery, those parts will bake pale and bland.
5. Press onto the baking sheet
Spread the mixture evenly on the prepared baking sheet. Press it down firmly with a spatula into an even layer.
This is your control point. Thin, even thickness means even browning. Thick mounds stay soft in the middle while the edges darken too fast.
6. Bake until golden
Bake for 25 to 32 minutes, rotating the pan once halfway through if your oven has hot spots.
You are looking for light golden brown edges and a toasted aroma. Do not wait until the entire tray looks deeply brown. Granola continues to darken slightly as it cools.
If using coconut, add it during the last 8 to 10 minutes so it toasts without burning.
7. Cool completely
Take the pan out and let the granola cool fully on the tray.
Do not stir it right away.
This is the hardest part for impatient cooks, but it is also the part that helps clusters form. Once cool, break it into pieces as large or small as you like.
8. Add dried fruit
Once the granola is fully cool, stir in dried cranberries, raisins, or chopped dried apricots.
Adding dried fruit before baking often makes it too tough or overly dark. After baking, it stays plump and chewy.
The Small Mistakes That Ruin Granola
Granola is easy, but it is also easy to sabotage with a few habits.
Mistake 1: baking too hot
A hotter oven sounds faster, but it usually burns the sweetener before the oats fully toast. Lower heat gives you better control and deeper flavor.
Mistake 2: stirring too much
If you want loose, snacky granola, stirring more is fine. If you want clusters, less movement is better.
Mistake 3: pulling it too early because it feels soft
Fresh from the oven, granola often seems underdone. The real test comes after cooling. If it smells toasted and looks golden, it will usually crisp as it rests.
Mistake 4: overcrowding the pan
Too much mixture on one sheet traps steam. Steam softens. Toasting crisps. If you double the recipe, use two pans.
Easy Variations Based on What You Want This Week
This is where granola becomes useful instead of repetitive.
For a cozier batch
Add extra cinnamon and a pinch of nutmeg. Serve it with warm milk or over yogurt with sliced apples. It pairs especially well with flavors from Protein Muffins: Simple, Satisfying & Full of Flavor or The Ultimate Oatmeal Apple Breakfast Bake: Healthy, Cozy & Perfect for Meal Prep.
For a higher-protein breakfast setup
Keep the granola recipe as written, but serve it over thick Greek yogurt instead of eating it like cereal. That decision changes the meal from a crunchy topping into a more balanced breakfast.
For more crunch and less sweetness
Use more nuts and seeds, and keep the dried fruit light. This gives you a more savory-leaning breakfast granola that works beautifully on smoothie bowls, including ideas like The Ultimate Protein Smoothie Bowl for a Quick Healthy Breakfast.
For a more indulgent weekend feel
Add dark chocolate chips after cooling. The granola becomes more snack-like, but still keeps that hearty oat base.
How to Serve It for Breakfast Without Getting Bored
The easiest way to get tired of granola is to serve it the same way every day.
Try it over Greek yogurt with berries for a cool, creamy contrast.
Use it as a topping on smoothie bowls when you want texture against soft fruit.
Pour cold milk over it for a fast breakfast that feels familiar but more substantial than boxed cereal.
Scatter it over sliced bananas with a spoonful of yogurt for a breakfast that takes two minutes and still feels put together.
Or pack some in a jar for an easy desk snack when lunch is far away.
The crunchy-soft contrast is what keeps this breakfast interesting. Granola on something creamy nearly always tastes better than granola eaten plain.
How to Store Granola So It Stays Crisp
Once fully cooled, store the granola in an airtight container or glass jar at room temperature.
It should stay crisp for about 2 to 3 weeks if your kitchen is not overly humid.
The biggest storage mistake is sealing it while still warm. That traps moisture and softens all the work you just did in the oven.
If it ever loses some crunch, spread it on a sheet pan and warm it in a low oven for a few minutes, then cool it again.
FAQ
Can I make this granola recipe without nuts?
Yes. Replace the nuts with more seeds, such as pumpkin seeds, sunflower seeds, or hemp seeds. The texture will be different, but it can still be crunchy and satisfying.
Is honey or maple syrup better for granola?
Both work. Honey usually gives slightly stickier clusters, while maple syrup tends to give a lighter, toastier finish. Choose based on the texture you want.
Why is my granola not crunchy?
It is usually one of three things: the oven was too cool, the mixture was too thick on the pan, or the granola was stored before it cooled completely.
Can I use quick oats?
You can, but the texture is not as good. Rolled oats create a heartier, more classic granola texture and hold up better in clusters.
When should I add dried fruit?
Always after baking. That keeps the fruit chewy instead of hard or overly dark.
Final Thoughts
A good granola recipe should make breakfast easier, not more complicated. This one works because it gives you control over the texture, keeps the sweetness balanced, and turns basic pantry ingredients into something that tastes much better than most store-bought versions.
It is crunchy, flexible, and easy to make your own. Once you bake one batch and learn what creates the best clusters, you can keep adjusting the flavors without losing the formula. That is what makes homemade granola worth repeating.