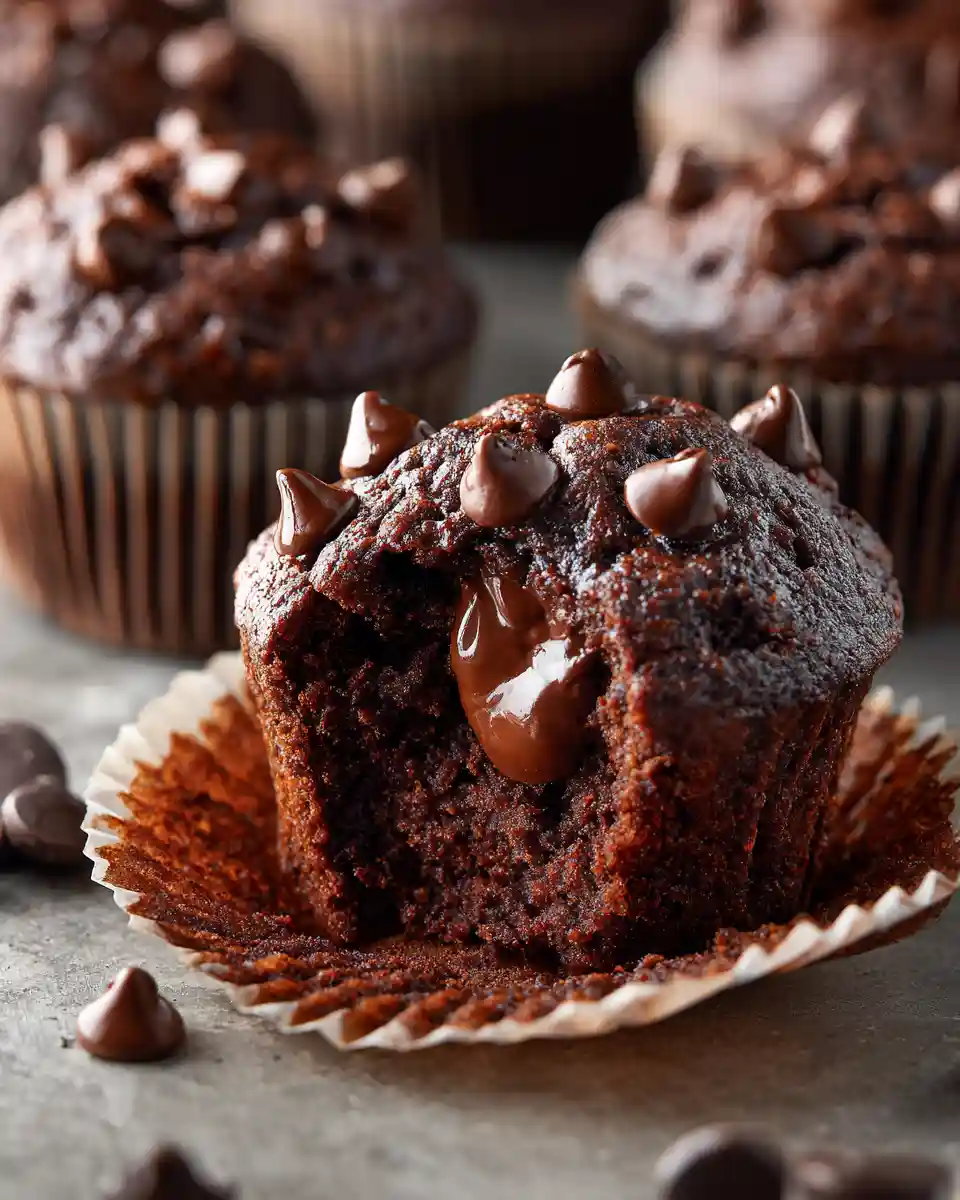
If you want chocolate muffins that look like they came from a bakery, with tall tops, a rich cocoa flavor, and a soft moist center, this is the recipe to keep. The biggest problem with homemade chocolate muffins is not the chocolate, it is the texture, and this method fixes that from the start.
Some chocolate muffin recipes turn out dry by the next morning. Others bake up flat, dense, or too sweet without tasting deeply chocolaty. These muffins are built to give you a better result: tender crumb, rounded tops, and enough chocolate flavor to feel special without becoming heavy.
Jake Moreno here, and this is the kind of bake I love because the payoff looks impressive while the method stays simple. No mixer, no complicated folding, no hard-to-find ingredients, just a few smart baking decisions that make the difference between average muffins and the kind people reach for first.
Why Most Homemade Chocolate Muffins Miss the Mark
A lot of muffin recipes fail for predictable reasons.
First, the batter is often overmixed. That develops too much gluten, which leads to a tougher crumb. Instead of a soft bakery-style bite, you get a tighter texture that feels more like a bad snack cake.
Second, many recipes do not use enough moisture. Cocoa powder absorbs liquid fast, so a batter that looks normal can still bake dry. That is why chocolate muffins need a little more attention than plain vanilla ones.
Third, oven strategy matters more than people think. If the oven is not hot enough at the start, muffins spread before they rise. You still get something tasty, but you lose that classic domed muffin top that makes them look bakery-made.
This recipe fixes all three problems. It uses the right moisture balance, a gentle mixing method, and a simple heat strategy that helps create a better rise.
What Makes These Muffins Moist and Bakery-Style
The secret is not one magical ingredient. It is the way several ingredients work together.
Oil keeps the crumb soft even after the muffins cool. Butter can taste wonderful, but oil is more reliable when your goal is long-lasting moisture. Milk adds structure and tenderness. Eggs help bind the batter while supporting lift. A little brown sugar adds extra softness and a deeper flavor than white sugar alone.
Then there is the hot liquid. Blooming cocoa with warm coffee or hot water helps wake up the cocoa flavor so the muffins taste more chocolate-forward instead of dusty or muted. Coffee does not make them taste like coffee. It just pushes the chocolate flavor deeper.
Chocolate chips also matter here. They are not only for pockets of melted chocolate. They help create contrast inside the muffin, so each bite feels richer and more bakery-style.
For readers who enjoy cozy bakes, you might also like the texture focus in this banana bread recipe without butter or the sweeter treat direction of this protein muffins, especially if you enjoy comparing different muffin styles.
Ingredients for the Best Chocolate Muffins
Here is everything you need for a batch of 12 standard muffins.
Dry ingredients
- 1 and 3/4 cups all-purpose flour
- 1/2 cup unsweetened cocoa powder
- 1 teaspoon baking powder
- 1 teaspoon baking soda
- 1/2 teaspoon fine salt
Wet ingredients
- 2 large eggs
- 1/2 cup granulated sugar
- 1/2 cup packed light brown sugar
- 1/2 cup neutral oil, such as canola or vegetable oil
- 3/4 cup whole milk
- 1 teaspoon vanilla extract
- 1/2 cup hot coffee or hot water
Chocolate add-ins
- 3/4 cup semisweet chocolate chips, plus extra for topping
Optional finishing touch
- coarse sugar for a bakery-style top
This ingredient list is simple, but each part has a job. The flour provides structure. The cocoa delivers flavor. The combination of baking powder and baking soda helps lift the batter. The mix of white and brown sugar gives sweetness plus softness. The oil keeps the muffins moist. The hot liquid blooms the cocoa and smooths the batter.
Ingredient Decisions That Change the Texture
This is where the recipe gets smarter.
Decision 1: Coffee or hot water?
Choose hot coffee if you want deeper chocolate flavor. Choose hot water if you want a more neutral background. Both work, but coffee usually gives a more bakery-like result because the cocoa tastes fuller.
Decision 2: Whole milk or lower-fat milk?
Whole milk is the better choice if you want the richest crumb. Lower-fat milk works in a pinch, but the muffins may feel slightly less plush.
Decision 3: Regular cocoa or Dutch-process?
Use regular unsweetened cocoa unless you are confident adjusting the leavening. This recipe is designed for natural cocoa. That keeps the chemistry consistent and helps the muffins rise properly.
Decision 4: Mini chips or standard chips?
Standard chips create bigger pockets of melted chocolate. Mini chips distribute more evenly. If you want a more dramatic muffin with visible chocolate streaks, use standard chips.
That same kind of ingredient choice is what makes successful baking content so helpful. Readers do not just want a list, they want to know what each option changes.
How to Make Chocolate Muffins Step by Step
Step 1: Prep the pan and oven
Preheat your oven to 425°F. Line a 12-cup muffin pan with paper liners or lightly grease the wells.
That higher starting temperature helps the muffins rise quickly and form taller tops. It is one of the easiest bakery-style upgrades you can use at home.
Step 2: Mix the dry ingredients
In a large bowl, whisk together the flour, cocoa powder, baking powder, baking soda, and salt.
Whisk well here. Cocoa tends to clump, and breaking those clumps now gives you a smoother batter later.
Step 3: Mix the wet ingredients
In a separate medium bowl, whisk the eggs, granulated sugar, brown sugar, oil, milk, and vanilla until smooth.
The mixture should look glossy and well combined. If the brown sugar still has small lumps, keep whisking for another 20 to 30 seconds.
Step 4: Bloom the cocoa as you combine
Pour the wet mixture into the dry ingredients. Add the hot coffee or hot water. Stir gently with a spatula or wooden spoon until the flour is mostly incorporated.
The batter will look looser than some muffin batters, and that is okay. Chocolate batter often thickens as it rests.
Step 5: Fold in the chocolate chips
Add the chocolate chips and fold just until evenly distributed.
Stop once you do not see streaks of dry flour. A few small lumps are better than overmixing. That is the difference between a tender muffin and a chewy one.
Step 6: Fill the muffin pan
Divide the batter evenly between the 12 muffin cups. Fill them generously, close to the top. Sprinkle a few extra chocolate chips and a pinch of coarse sugar on top if you want a more bakery-style finish.
A fuller muffin cup encourages a better dome. Underfilling often leads to smaller, flatter muffins.
Step 7: Bake with a simple heat shift
Bake at 425°F for 5 minutes, then, without opening the oven door, reduce the temperature to 350°F and bake for another 12 to 15 minutes.
The muffins are done when the tops are set and a toothpick inserted into the center comes out with a few moist crumbs, not wet batter. If melted chocolate hits the toothpick, test again in a different spot.
Step 8: Cool the right way
Let the muffins cool in the pan for 5 minutes, then transfer them to a wire rack.
If you leave them in the pan too long, the trapped heat can soften the liners and over-steam the bottoms. You want them warm, not damp.
The Most Important Muffin Mistakes to Avoid
Mistake 1: Overmixing the batter
This is the fastest way to lose tenderness. Stir until combined, then stop. A perfect muffin batter is not perfectly smooth.
Mistake 2: Scooping flour directly with the measuring cup
That packs in too much flour and throws off the whole texture. Spoon the flour into the measuring cup and level it off.
Mistake 3: Using cold ingredients straight from the fridge
Cold milk and eggs can make the batter less even. Room temperature ingredients mix more smoothly and help the muffins rise more evenly.
Mistake 4: Baking at one low temperature from start to finish
If you skip the hot start, the muffins can still taste good, but the tops are more likely to stay flat.
Mistake 5: Waiting too long to bake the batter
Once the wet and dry ingredients are combined, the leavening starts working. Get the batter into the oven without a long delay.
Good Muffins vs Dry Muffins
Here is the simplest comparison guide.
Good muffins
- rounded domed tops
- soft crumb with small tender pockets
- rich chocolate smell the moment they cool
- moist center that does not feel gummy
- visible melted chocolate in the bite
Dry muffins
- flat or lightly sunken tops
- crumb that breaks apart too easily
- powdery cocoa taste
- edges that feel hard by the next day
- dry center that needs milk to feel enjoyable
If your muffins lean dry, the most likely causes are too much flour, too much mixing, or too much baking time. That is good news, because all three are easy to fix next time.
If you love rich breakfast-style bakes, this recipe sits nicely near a cozy option like apple cinnamon oatmeal or a sweeter brunch favorite like blueberry french toast casserole.
Easy Variations and Add-Ins
This base recipe is strong enough to customize without losing its structure.
Double chocolate muffins
Increase the chocolate chips to 1 cup for extra chocolate in every bite.
Chocolate walnut muffins
Add 1/2 cup chopped walnuts for crunch and contrast. This works especially well if you like texture in softer bakes.
Espresso chocolate muffins
Use hot coffee and add 1/2 teaspoon espresso powder to deepen the cocoa flavor even more.
Bakery-style jumbo muffins
Use a jumbo muffin pan and bake a smaller number of muffins, watching the baking time carefully. The tops get especially dramatic.
Chocolate banana muffins
Fold in 1/2 cup mashed ripe banana for a softer interior and a slightly sweeter flavor. Do not add too much or the structure gets too soft.
How to Store, Freeze, and Reheat
Chocolate muffins are at their best the day they are baked, but they store well if handled properly.
At room temperature
Store in an airtight container for up to 3 days. Place a paper towel under and over the muffins to help absorb excess moisture.
In the fridge
You can refrigerate them for up to 5 days, but the crumb may firm up a little. Let them come to room temperature before serving, or warm briefly.
In the freezer
Freeze in a sealed freezer-safe bag or container for up to 2 months. Wrap individually if you want easy grab-and-go portions.
To reheat
Microwave one muffin for about 10 to 15 seconds. That softens the crumb and remelts some of the chocolate, bringing back that fresh-baked feel.
FAQ About Chocolate Muffins
Can I make these muffins without coffee?
Yes. Use hot water instead. The muffins will still taste chocolaty, just a little less deep and intense.
Why are my chocolate muffins dry?
Usually because of too much flour, overmixing, or baking too long. Chocolate batter needs careful measuring and a gentle hand.
Can I use butter instead of oil?
You can, but the muffins may not stay as moist. Oil is the better choice for a soft bakery-style crumb.
Can I make mini chocolate muffins?
Yes. Use a mini muffin pan and reduce the baking time significantly. Watch closely, because mini muffins can dry out fast.
How do I get taller muffin tops?
Start with a hotter oven, fill the muffin cups well, and avoid overmixing. Those three changes matter more than most people expect.
Final Thoughts
The best thing about this chocolate muffins recipe is that it does not chase bakery-style results with complicated steps. It gets there by making the right decisions at the right moments: enough moisture, a hot oven start, gentle mixing, and just enough chocolate to make every bite feel worth it.
If your goal is a muffin that looks generous, tastes rich, and stays moist past the first hour, this recipe does the job. Bake them for breakfast, snack time, lunchboxes, or a simple weekend treat, and they will still feel a little special.