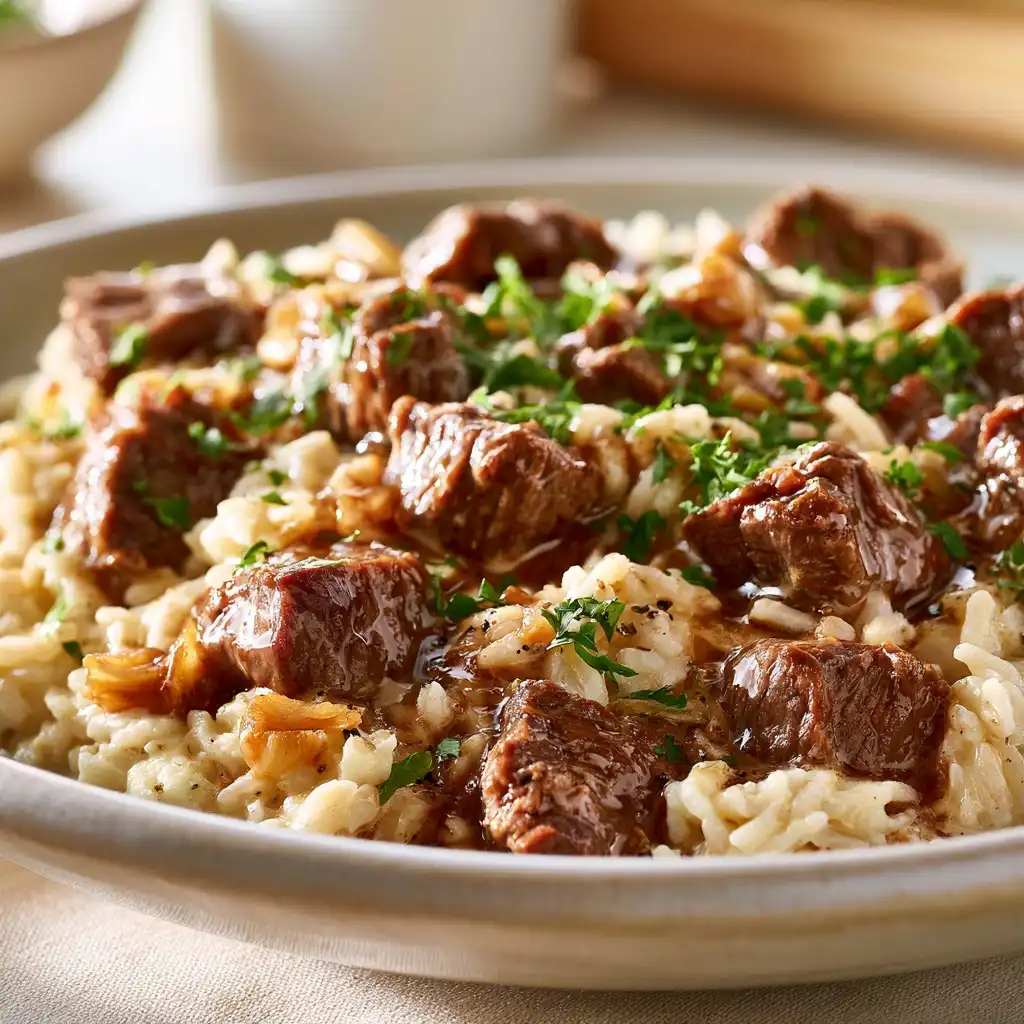
A cheesy beef loaded nacho bowl is a crowd-pleasing main dish combining seasoned ground beef, crispy tortilla chips, melted cheese, and fresh toppings in one irresistible bowl. This easy dinner comes together in under 30 minutes, requires minimal cleanup, and delivers maximum satisfaction for families and gatherings. Whether you’re feeding picky eaters or hosting a casual meal, this nacho bowl recipe adapts to your preferences and pantry staples.
 3")
| Prep Time | Cook Time | Total Time | Servings | Difficulty | Cuisine |
|---|---|---|---|---|---|
| 10 minutes | 15 minutes | 25 minutes | 4 servings | Easy | Mexican-American |
Why This Recipe Works
This cheesy beef loaded nacho bowl works because it layers flavors and textures strategically, creating a satisfying meal without complicated techniques. The seasoned ground beef provides savory, protein-rich substance while cheese melts into every layer for binding richness. Crispy chips stay crunchy when added fresh, and toppings remain customizable for every preference at the table.
The appeal lies in speed and versatility. You brown meat in one pan, assemble components in a bowl, and serve immediately. No baking required, no standing time needed, and no special equipment demanded. This approach solves the weeknight dinner dilemma by delivering restaurant-quality satisfaction in your own kitchen within 25 minutes total.
Additionally, the nacho bowl format encourages portion control and personalization. Guests layer their own preferred ratios of chips, beef, cheese, and toppings. Families appreciate the interactive element, while budget-conscious cooks appreciate using pantry staples effectively.
Ingredients
Gather these simple ingredients for an authentic cheesy beef loaded nacho bowl that impresses without fancy specialty items.
| Ingredient | Quantity | Notes |
|---|---|---|
| Ground beef | 1.5 pounds | 80/20 lean-to-fat ratio recommended for juiciness |
| Tortilla chips | 4 cups | Sturdy, thick-cut varieties hold toppings better |
| Shredded cheddar cheese | 2 cups | Sharp cheddar adds deeper flavor; freshly shredded melts smoothly |
| Salsa | 1 cup | Use favorite style: fresh, medium, or hot |
| Sour cream | 3/4 cup | Full-fat sour cream provides richness; drizzle before serving |
| Yellow onion | 1 medium | Diced for even cooking and texture |
| Garlic cloves | 3 cloves | Minced fresh garlic or 1 teaspoon powder |
| Cumin | 1.5 teaspoons | Ground cumin adds authentic Mexican depth |
| Chili powder | 1 teaspoon | Adjustable to heat preference; start with half if sensitive |
| Salt and black pepper | To taste | Season throughout cooking, not just at end |
| Jalapeños (optional) | 2-3 peppers | Sliced fresh for heat and brightness |
| Fresh cilantro (optional) | 1/4 cup | Chopped for garnish and herbaceous notes |
Step-by-Step Instructions
Prepare the Base
- Dice one medium yellow onion into small, uniform pieces to ensure even cooking throughout the browning process.
- Mince three fresh garlic cloves by flattening them under your knife blade and cutting finely, or use one teaspoon of garlic powder.
- Measure out 1.5 teaspoons cumin and one teaspoon chili powder into a small bowl for easy access during cooking.
Cook the Ground Beef
- Heat a large skillet over medium-high heat and add 1.5 pounds of ground beef once the pan is hot and dry.
- Break up the beef with a wooden spoon as it cooks, pressing it against the pan bottom to achieve fine, even crumbles.
- Cook the beef for six to eight minutes, stirring occasionally, until it loses its pink color and browns slightly.
- Drain excess fat by tilting the pan carefully and using a spoon to push grease toward the pour spout.
- Return the skillet to heat and add diced onion to the cooked beef, stirring well to combine.
- Cook the onion and beef mixture for three minutes, allowing the onion to soften slightly and become fragrant.
- Add minced garlic, cumin, and chili powder to the beef mixture and stir constantly for one minute to bloom the spices.
- Pour in one cup of salsa and stir thoroughly until all ingredients combine into a cohesive, saucy mixture.
- Simmer the beef mixture over medium heat for three minutes, allowing flavors to meld without reducing too much liquid.
- Taste the beef and adjust seasoning with salt and black pepper to reach your preferred flavor level.
Assemble the Nacho Bowl
- Place four cups of tortilla chips into a large serving bowl or individual bowls, distributing them evenly across the bottom.
- Pour the hot seasoned ground beef mixture over the tortilla chips, spreading it across layers to ensure chip coverage.
- Sprinkle two cups of shredded cheddar cheese over the beef while it remains hot, allowing the cheese to begin melting.
- Drizzle 3/4 cup of sour cream in decorative lines across the top of the nacho bowl.
- Add sliced jalapeños, fresh cilantro, and any additional preferred toppings immediately before serving.
- Serve the cheesy beef loaded nacho bowl immediately while chips maintain crunchiness and cheese remains creamy.
Pro Tips for Best Results
- Toast your tortilla chips briefly in a 300-degree oven for five minutes before assembly to lock in crunchiness and prevent them from absorbing moisture from the beef mixture prematurely.
- Use freshly shredded cheddar cheese rather than pre-shredded varieties, as the added cellulose prevents smooth melting and creates grainy texture that detracts from the dish.
- Warm your serving bowls in the oven at 200 degrees for ten minutes before assembly, keeping the nacho bowl at optimal temperature longer and enhancing cheese melting.
- Bloom your cumin and chili powder in the hot beef fat for at least one minute to release essential oils and intensify their flavor contribution beyond simple mixing.
- Reserve a small portion of the beef mixture before salsa addition if you prefer a less wet final product, allowing you to adjust moisture levels for each serving individually.
- Taste the seasoned beef before assembly and adjust salt aggressively, as the neutral chips and cheese dilute saltiness and require bolder seasoning than you might initially expect.
Common Mistakes to Avoid
Mistake 1: Chips become soggy during assembly. This happens when chips sit directly under hot beef and moisture transfers into their structure. Fix this by adding chips last, just before serving, or layering them between beef sections rather than underneath everything.
Mistake 2: Cheese doesn’t melt evenly. Pre-shredded cheese contains anti-caking agents preventing proper melting into smooth layers. Solve this by shredding cheese from a block yourself, or warming it briefly in the microwave before sprinkling over the hot beef.
Mistake 3: Beef tastes bland despite seasoning. Undercooking spices before adding liquids prevents them from releasing their full flavor potential. Start with toasting cumin and chili powder in the beef fat for one full minute, stirring constantly, before any liquid additions.
Mistake 4: Overcrowding causes uneven cooking. Too many ingredients piled high means bottom layers remain cool while tops burn. Create even layers with moderate ingredient quantities, or make individual bowls rather than one giant shared serving dish.
Mistake 5: Sour cream breaks or becomes thin when heated. Adding cold sour cream directly to piping hot components or placing it near direct heat causes it to separate. Drizzle sour cream on top immediately before serving, after the nacho bowl cools slightly, rather than mixing it into hot components.
Variations and Substitutions
| Ingredient | Substitution | Flavor Impact |
|---|---|---|
| Ground beef | Ground turkey (93% lean) | Leaner, milder protein; requires extra fat and seasoning |
| Ground beef | Shredded rotisserie chicken | Lighter, poultry-forward; works best with cilantro-lime notes |
| Cheddar cheese | Monterey Jack or Oaxaca | Creamier melt; milder flavor that lets other ingredients shine |
| Cheddar cheese | Pepper Jack with jalapeños | Spicier, bolder; reduces need for additional chili powder |
| Salsa | Pico de gallo or fresh tomato mix | Fresher, brighter; less moisture but more texture contrast |
| Salsa | Corn salsa or black bean mixture | Heartier, more substantial; adds complementary fiber and sweetness |
| Tortilla chips | Crispy wonton strips or fried polenta | Different crunch profile; works well with unexpected global fusion angles |
| Cumin | Smoked paprika | Smokier, less earthy; adds depth without cumin’s nuttiness |
Serving Ideas
Serve your cheesy beef loaded nacho bowl at casual game-day gatherings with cold beverages and lime wedges on the side. The interactive nature pairs perfectly with football, soccer, or movie nights where guests arrive at staggered times.
Transform the nacho bowl into a taco bar by offering crispy taco shells alongside the bowl components, allowing guests to build tacos from the same seasoned beef. This approach doubles the meal’s appeal and accommodates different texture preferences simultaneously.
Plate individual nacho bowls for date night or small family dinners, garnishing each with a cilantro sprig and lime wedge for restaurant-quality presentation. This eliminates shared-utensil concerns and creates an impressive plated dish.
Serve the cheesy beef loaded nacho bowl as part of a Cinco de Mayo or Mexican-themed party spread alongside Mexican rice, refried beans, and churros for dessert. The nacho bowl anchors the menu as a substantial, crowd-pleasing main.
Pack individual components into containers for next-day lunch bowls, keeping chips separate and assembling fresh only before eating. Salsa and sour cream travel safely in sealed containers when packed last.
Storage and Reheating
| Method | Duration | Instructions |
|---|---|---|
| Refrigerate beef mixture | 3-4 days | Transfer cooked, cooled beef to an airtight container. Freeze salsa and sour cream separately. |
| Freeze beef mixture | 2-3 months | Cool completely and transfer to freezer-safe bags or containers, removing excess air to prevent freezer burn. |
| Reheat on stovetop | 5-7 minutes | Place beef mixture in a skillet over medium heat, stirring occasionally, until heated through. Add splash of water if too dry. |
| Reheat in microwave | 2-3 minutes | Transfer to microwave-safe container, cover loosely, and heat at 50% power, stirring halfway through to prevent splattering. |
| Store chips separately | Up to 2 weeks | Keep unopened chip bags in a cool, dry place. Always assemble chips fresh immediately before serving to maintain crunch. |
| Refrigerate sour cream | Up to 2 weeks unopened | Keep in original container. Add to nacho bowl immediately before serving, not during assembly or reheating. |
Nutritional Information
The following approximate values represent one serving of the cheesy beef loaded nacho bowl based on the recipe yielding four servings.
| Nutrient | Amount per Serving |
|---|---|
| Calories | 680-720 |
| Total Fat | 42-46g |
| Saturated Fat | 18-22g |
| Protein | 35-38g |
| Total Carbohydrates | 52-58g |
| Dietary Fiber | 3-4g |
| Total Sugars | 2-3g |
| Sodium | 1,100-1,350mg |
| Cholesterol | 65-75mg |
Nutritional values vary based on specific ingredient brands, preparation methods, and portion sizes. Use these figures as general guidelines rather than exact measurements.
Frequently Asked Questions
Can I make a cheesy beef loaded nacho bowl ahead of time for parties?
Yes, prepare the seasoned ground beef mixture completely up to one day ahead and store it in the refrigerator in an airtight container. Reheat gently on the stovetop or microwave just before serving. Keep tortilla chips in their original bag to maintain crunchiness, and assemble the nacho bowl immediately before guests eat to prevent chip sogginess.
What’s the best way to reheat ground beef for nacho bowl recipes?
Stovetop reheating works best for preserving texture and flavor. Place the chilled beef mixture in a skillet over medium heat, stirring frequently for five to seven minutes until heated throughout. Add a splash of water or additional salsa if the mixture seems dry, preventing it from sticking to the pan.
How can I make loaded nachos with ground beef for dietary restrictions?
Ground turkey (93% lean) substitutes effectively for beef, though it requires slightly more salt and fat since turkey is naturally leaner. For vegetarian options, use seasoned black beans or lentils in place of ground beef, adjusting spice levels to compensate for the different flavor profile.
Why do my tortilla chips get soggy in the nacho bowl?
Chips absorb moisture from hot beef and salsa over time. Add chips directly to serving bowls immediately before eating rather than pre-assembling, or layer chips between beef sections instead of placing all chips at the bottom where liquid accumulates.
Can I use different types of cheese for this easy nacho dinner recipe?
Absolutely. Monterey Jack offers creamier melting than cheddar, while Oaxaca provides authentic Mexican flavor. Pepper Jack adds spice if you prefer extra heat. Use freshly shredded cheese rather than pre-shredded varieties, which contain cellulose preventing smooth melting and resulting in grainy texture.
Conclusion
The cheesy beef loaded nacho bowl delivers restaurant-quality satisfaction in your home within 30 minutes, proving that weeknight dinners don’t require complicated techniques or expensive ingredients. By layering seasoned ground beef, melted cheese, crispy chips, and fresh toppings, you create a customizable meal that accommodates different preferences and appetites effortlessly. Whether you’re feeding a family, hosting friends, or preparing a quick weeknight dinner for yourself, this easy nacho bowl recipe becomes a reliable favorite worthy of regular rotation in your cooking schedule.
Print 4")
Cheesy Beef Loaded Nacho Bowl
- Total Time: 25
- Yield: 4 servings 1x
Description
A quick, customizable main dish combining seasoned ground beef, melted cheese, crispy tortilla chips, and vibrant toppings for a family-friendly Mexican-American meal ready in 25 minutes.
Ingredients
1 lb (450g) ground beef
1 tsp onion powder
1 tsp garlic powder
1 tsp chili powder
1 tsp ground cumin
1/2 tsp salt
1/4 tsp black pepper
3 cups crispy tortilla chips
2 cups shredded cheddar and Monterey Jack cheese blend
1/2 cup sour cream
1/2 cup diced tomatoes
1/4 cup diced jalapeño
1/4 cup chopped fresh cilantro
1/4 cup sliced green onions
1/4 cup sliced black olives
1/4 cup store-bought or homemade guacamole
Lime wedges for garnish
Instructions
Preheat oven to 375°F (190°C)
Heat large oven-safe skillet over medium heat
Brown beef, breaking into small pieces. Drain excess fat.
Sprinkle seasonings (onion, garlic, chili, cumin, salt, pepper) onto beef and stir to coat.
Ladle 1/4 of the beef mixture into 4 oven-safe bowls. Top each with 1/2 cup tortilla chips.
Evenly divide remaining beef and 1 1/2 cups cheese over chips in bowls.
Bake 5-7 minutes until cheese is melted and bubbly.
Top with remaining cheese, tortilla chips, sour cream, tomatoes, jalapeño, cilantro, onions, olives, and guacamole.
Garnish with lime wedges before serving
Notes
For large batches, use 13″x9″ baking dish
Pre-shredded cheese blends melt most evenly
Vegetarian option: Substitute beef with extra-firm tofu or plant-based ground substitute
Serve with cornbread or tortillas as sides
- Prep Time: 10
- Cook Time: 15
- Category: Dinner
- Method: Stovetop
- Cuisine: Mexican-American
Nutrition
- Serving Size: 1 bowl
- Calories: 750
- Sugar: 6g
- Sodium: 1800mg
- Fat: 52g
- Saturated Fat: 26g
- Carbohydrates: 48g
- Fiber: 3g
- Protein: 42g
- Cholesterol: 180mg